Computer Animation Week 10: Quaternions & SLERP

In week 4’s entry, I discussed different ways to represent orientation in three-dimensional space. I briefly mentioned quaternions, but didn’t go into depth on them. This week, I’m going to discuss them in depth, along with spherical linear interpolation (SLERP), a technique used to interpolate between quaternions.

A quaternion is a mathematical construct that can be used to represent rotations in three-dimensional space. It is essentially a 4D vector with elements <w, x, y, z>. For our purposes, we use a specific representation for rotations: <cos(\theta /2), \overrightarrow{n} * sin(\theta /2)>, where \theta is the angle of the rotation, and \overrightarrow{n} is the axis of rotation. Expanded, it becomes <cos(\theta/2), x * sin(\theta/2), y * sin(\theta/2), z * sin(\theta/2)>. Much like transformation matrices, we can concatenate two rotation quaternions by multiplying them. The derivation for this is somewhat complex, but for our code we can simply use the following formula:

\begin{matrix}  <w_1, x_1, y_1, z_1> * <w_2, x_2, y_2, z_2> =& <w_1*w_2 - x_1*x_2 - y_1*y_2 - z_1*z_2,\\  & w_1*x_2 + x_1*w_2 + y_1*z_2 - z_1*y_2,\\  & w_1*y_2 - x_1*z_2 + y_1*w_2 + z_1*x_2,\\  & w_1*z_2 + x_1*y_2 - y_1*x_2 + z_1*w_2>  \end{matrix}

In order to apply a rotation represented by a quaternion to a point or vector, we use the formula \overrightarrow{v'} = \hat{q}\hat{v}\hat{q}^c, where \hat{q} is the quaternion we want to apply, \hat {q}^c is the conjugate of that quaternion, which is just <w, -x, -y, -z>, and \hat{v} is the “pure” quaternion form of the vector \overrightarrow{v}, which is just <0, v_x, v_y, v_z>.

Now that we have the basics down, we can use these quaternions to do things that were not feasible before. For example, we can now interpolate rotation in addition to position. We can do this by using spherical linear interpolation, known as SLERP. This is done using the following formula: Slerp(\hat{q}_0, \hat{q}_1, t) = \frac{\hat{q}_0 sin((1 - t) \theta) + \hat{q}_1 sin(t\theta)}{sin\theta}.

Diagram showing the difference between LERPing between two points and SLERPing between them.

Computer Animation Week 9: Animation Blending

Animation blending is the process of combining two or more animations at run-time in order to produce an interesting amalgam of them. If you’ve implemented an animation system, and your character has more than one animation, you may have noticed that switching between these animations can be jerky and unnatural looking. We can use animation blending to smoothly transition from one animation to another. Another use of animation blending is combining two actions in order to limit the number of animations that the animator must create. For example, instead of having a walk animation, a waving animation, and a walk-and-wave animation, the animator can just create a walk animation and a wave animation, and we can then blend the two to create the walk-and-wave animation at run-time.

We begin this process by creating the various base animations. This can be done in any way you want, such as key-framing or skeletal animation, as the underlying algorithm remains the same. In order to transition from one animation to another, we keep a reference to both and update both of them synchronously. However, we then determine the final position of each vertex in the mesh to be rendered by linearly interpolating between the two, increasing the interpolation parameter as time goes on. As an example, let us use a walking animation transitioning into a running animation in the following pseudo-code:

float interpParam = getInterpParam(currentTime);
Mesh walkMesh = walkAnimation.getMesh(currentTime);
Mesh runMesh = runAnimation.getMesh(currentTime);
Mesh outputMesh;
for each vertex in walkMesh, runMesh
     outputMesh[vertex] = lerp(interpParam, walkMesh[vertex], runMesh[vertex]);
end

In order to combine two animations, such as walking and running, we use a similar process as above except with animation weights instead of the interpolation param. That is, each animation has a list of weights, one for each vertex (or each joint, in the case of skeletal animation). Then, when calculating the position of the output mesh’s vertices, we normalize the weights from each animation and use that instead of the regular interpolation param:

Mesh walkMesh = walkAnimation.getMesh(currentTime);
Mesh waveMesh = waveAnimation.getMesh(currentTime);
Mesh outputMesh;
for each vertex in walkMesh, waveMesh
     float weight1 = walkAnimation.getWeight(vertex);
     float weight2 = waveAnimation.getWeight(vertex);
     float interpParam = weight1 / (weight1 + weight2);
     outputMesh[vertex] = lerp(interpParam, walkMesh[vertex], waveMesh[vertex]);
end

Let’s say that we want to add some randomness to our walking animation, so that our character looks less like a robot and more human. We could do this procedurally, but sometimes animators like to have a bit more control over the final look of the animation. In order to accomplish this, we can use what is known as additive animations. Additive animations are animations that use an offset from T-pose in order to modify another animation. So, for example, we could make an animation where the character is standing in T-pose and is jittering slightly. When added to a walk animation, it will give the illusion that the character is moving more naturally, and less robotic looking. We can implement this in code by adding the offset from T-pose of this animation to the currently playing animation:

Mesh walkMesh = walkAnimation.getMesh(currentTime);
Mesh jitterMesh = jitterAnimation.getMesh(currentTime);
Mesh outputMesh;
for each vertex in walkMesh, jitterMesh
     vec3 offset = jitterMesh[vertex] - tPoseMesh[vertex];
     outputMesh[vertex] = walkMesh[vertex] + offset;
end

This jitter animation can then be added to any other animation, such as running. This saves our animator work, since they did not have to manually add jitter to each animation that they wanted it in.

Computer Animation Week 8: Skeletal Animation & Mesh Skinning

A few entries ago, I discussed the scene graph and the ability to use it to create a hierarchy of joints for character skeletons. The next step is using this hierarchy to animate a character, so that we don’t have to specify the exact position of each of its vertices for every keyframe. This is where skeletal animation and mesh skinning come in. Skeletal animation allows us to animate a character by manipulating joint angles rather than groups of vertices. Mesh skinning then “attaches” a mesh to the skeleton using joint weights, which determine how the surrounding vertices should deform according to joint orientation.

A mesh (left) and a skeleton (centre), with the mesh mapped to the skeleton and a weight applied (right).

The first step is to create a model and its skeleton within the 3D graphics software of your choice (Maya, Blender, etc.) and to paint on the weights for each joint. This is usually done by an animator, and is outside of the scope of this blog post. Instead, we will discuss how to implement the appropriate systems in your engine to be able to animate such models given keyframes that supply joint orientations for each joint in the skeleton.

A model and skeleton, with each component labelled.

In order to determine where a vertex in a mesh should be at a given keyframe, you need a few things. First, you need a list of all the joints in the skeleton with the orientation of each joint. In addition, you need a list of all of the weights for the vertex. A weight represents a factor of how much each joint affects the vertex. For example, a weight of 0 means that the joint does not affect the position of the vertex at all, while a weight of 0.5 indicates that the joint is 50% of the determining factor for the position of the vertex. Therefore, any vertex can be affected by any number of joints, but we usually limit it to four in order to reduce complexity. We determine the final position of the vertex by a weighted sum of the position transformed by each joint that affects it. The formula looks like this: vf = Σ(weighti * Ti * T-1ref * v), where vf is the final position, weighti is the weight on the vertex applied by joint i, Ti is the transform determined by joint i, and v is the vertex in its original position (T-pose). Since the vertex need to be in the same frame of reference as the joint to apply its transformation, we use T-1ref, which is the transformation from T-pose to the joint’s local frame.

Computer Animation Week 7: Particles

This week, we learned how to implement particles in our engine. Particles are individual entities that leverage physics-based simulation to produce interesting animation effects. Particle systems are objects that contain a list of particles, which applies forces to and calls the update function for each particle. Finally, a particle manager is a class that maintains all of the particle systems in the scene. It has a list of them, and handles creation, deletion, and particle system-specific updates for them.

particleHierarchy

Relationship structure of the various classes required for particles.

Each particle maintains its own attributes such as lifetime, position, velocity, and acceleration. Each iteration, it updates these values using values that are passed to it from its particle system, such as any external forces applied to it. As with any physics simulation, it does so in about three lines of code. First, it calculates the current acceleration by dividing the sum of any applied forces by its mass (which is a parameter that can be set beforehand and either stored per-particle or in the particle system). Then, it calculates the current velocity using the formula v = v0 + a*t, where v0 is the previous velocity, a is the current acceleration, and t is the time that has passed since the last update (which is passed in from the system). Finally, the position of the particle is updated using the formula p = p0 + v*t + 0.5*a*t2, where p0 is the previous position and v is the current velocity. When rendering the particles, they can be rendered as points, as alpha-blended textured sprites, or even as full 3D meshes. This gives us the ability to create a large variety of interesting effects when using particles, from rain, to smoke, and even swarms of insects.

Particle systems rendered using points (left), textured sprites (middle), and 3D meshes (right).

Particle systems rendered using points (left), textured sprites (middle), and 3D meshes (right).

This all fits in quite nicely with the scene graph we discussed in the last blog. The particle systems would be scene nodes, but the particle manager and individual particles would not be. This way, the particle systems would update themselves and their particles during the scene graph’s update, and subsequently draw during the scene graph’s draw. The particle manager would handle creation and deletion of particle systems, as well as any updates that do not relate to the scene graph in a separate update call.

Something that is worth noting for the future, which I have yet to implement, is to update the particles on the GPU rather than on the CPU. There are likely to be a large number of particles in any given particle system, and when you have multiple of these systems in your scene it can start to affect the framerate. Pushing the update calculations onto the GPU can help with this, since the GPU is more specialized for such calculations and will reduce the workload for the CPU.

Computer Animation Week 6: Scene Graphs and Forward Kinematics

Say that you want to attach an object to a character – be it a sword in their hand, or maybe an orb that floats around them. You don’t want to have to manually update the position of that object every time the character moves, especially if it always stays at the same position relative to the character. So how do you achieve this?

The answer is scene graphs. A scene graph organizes the objects in a scene into a hierarchy, with the world (usually the terrain) at the root. Each node of the graph represents an object in the scene, and each has a transform to represent its position and orientation relative to its parent. Each object can have any number of children, but can only have a single parent. Therefore, in the above examples, the sword and the orb would be children of the character. Say that you wanted to have the orb instead float around the sword that the character is carrying. In this case, the sword would be a child of the character, and the orb would be a child of the sword.

A sample scene graph, represented graphically, of a solar system.

So, how does this help us? Since each node has a transform that defines its position and orientation relative to its parent, it significantly simplifies how we specify this information. This is where forward kinematics comes in. Forward kinematics uses local transforms, multiplied up the scene graph, to find a global transform for each node in the graph. To find the global transform of a node, we multiply the global transform of its parent with the local transform (which is relative to the parent). Thus, we get the equation worldTchild = worldTparent * parentTchild, where bTa can be read as “the transform from a to b”. This is done recursively when we update the scene. We start at the root, whose global transform (which also happens to be its local transform) is usually just the identity matrix. We then update all of its children, passing this global transform to them, and they update their global transform. The cycle continues for each node: first updating the local transform if needed, then using the global transform received from the parent to update its own global transform, then passing that to its own children so they can update. The global transform for each node is what we then pass to the renderer in our system to correctly render each object around the scene.

As it turns out, this entire system can not only apply to discrete objects in the scene, but also to character skeletons. The skeleton itself would be defined by an artist, but when importing the skeleton into the scene, you would make a node for each joint. The root of the skeleton is usually the base of the spine, with each other joint being a descendant of it. This root would then be attached to the scene graph by making it a child of either the world itself (most cases), or some other object in the scene (example: character sitting in a car).

Computer Animation Week 5: Interpolation Speed Control

A couple of entries back, I wrote about interpolation, which is the process of constructing new data points within the range of known data points. If you’ve played around with this concept using more than two data points, I’m sure that you’ve encountered something rather peculiar about it. If the interpolation parameter is manipulated as a direct function of time, you’ll notice that segments of different length will be interpolated across at different speeds. A shorter segment will appear to interpolate more slowly, and a longer segment more quickly. This is due to the fact that the interpolation takes a constant amount of time to go from the beginning of a segment to the end, regardless of how long the segment is, since the interpolation parameter represents the percentage completed of the segment. The way that we can circumvent this behaviour in order to control the speed at which we interpolate across a curve as a whole is by utilizing a process called interpolation speed control. Essentially, it is interpolation using a distance/time function to determine where on the curve we should be at any given time.

Sampling of a curve at regular intervals.

We begin this process by sampling the target curve. This is done by creating what is called a “distance table”. The table has three columns: interpolation parameter, point, and distance. The first stores the interpolation parameter corresponding to the percentage between the two endpoints of the current segment that the point is. The next stores the x, y, and z coordinates of the current entry. The last column stores the distance that this point is from the beginning of the curve. The distance table is populated by looping through each segment on the curve, interpolating on each segment at a very short interval,  and storing an entry at each. For example, if we choose our step value to be 0.1, we would interpolate across the current segment by incrementing the interpolation parameter by 0.1 each time, and creating an entry in the table at each increment. Each time, we increment a distance variable by the distance between the current entry’s point and the last one. We then repeat this for each other segment in the curve, with the distance continually increasing so that it represents the distance from the beginning of the curve.

Sample distance table.

Sample distance table.

The next step after we have a distance table is to create a speed profile, which is usually done by the designer or artist. The speed profile basically represents distance from the start of the curve as a function of time. Therefore, to find where on the curve we should be, use the speed profile by passing it the elapsed time since we began moving on the curve. It will return the distance from the beginning of the curve that we should currently be at. For example, if I have a speed profile that represents the function d = f(t) = 2x2, and 2 seconds has elapsed, the distance we should currently be at would be 2*(4) = 8 units from the beginning of the curve.

An ease-in, ease out speed profile, represented graphically.

An ease-in, ease out speed profile, represented graphically.

Using the distance that we get from the speed profile, we can now easily determine what point we should be at. We simply traverse the distance table that we created earlier, and find the first entry whose distance value is greater than or equal to the one we got from the speed profile. If it is greater, we interpolate between this entry and the last to find a point that corresponds to our distance. For example, if the value that we got from the speed profile is 8, and the two closest entries in our distance table are 7 and 9,  we would determine the interpolation value between them (u = (9-8) / (9-7) = 0.5), and then interpolate their points to find the point corresponding to a distance of 8.

That’s it! We now have a system in place to control the speed of interpolation of a curve based on a speed profile that is determined by our designers or artists.

Computer Animation Week 4: Orientation

There are several ways to represent the orientation of an object in 3-dimensional space. Some important methods include Euler angles, coordinate frames, and quaternions.

Euler angles are values that represent the pitch, yaw, and roll of an object. These are angles that the object is rotated around on its local axes, as opposed to global axes. The yaw represents the angle than an object is rotated about its y-axis, the pitch is the angle it is rotated about its x-axis, and the roll is the angle it is rotated about its z-axis. This system has the advantage of being intuitive and easy to implement, but has the disadvantage of being susceptible to gimbal lock. Gimbal lock is the loss of one degree of freedom when two axes of rotation align in a parallel orientation, causing the object to only be able to rotate in two dimensions.

Coordinate frames are an important tool for defining the position and orientation of an object in 3-dimensional space. They work by defining an object’s direction vector (\overrightarrow{D}), up vector (\overrightarrow{U}), and right vector (\overrightarrow{R}). These vectors are all fairly self-explanatory; the direction vector points forward in the direction the object is facing, the up vector points up from the object, and the right vector points towards the right side of the object.  By combining these three vectors into a 3×3 matrix, [\overrightarrow{R}\overrightarrow{U}\overrightarrow{D}], we can fully define the orientation of the object. This can then combined with a vector that represents the object’s position in space (called \overrightarrow{E}), creating a matrix which fully represents the object’s coordinate frame: [\overrightarrow{R}\overrightarrow{U}\overrightarrow{D}\overrightarrow{E}]. We add an extra row ([0 0 0 1]) at the bottom to make it into a 4×4 matrix.

I will discuss quaternions in a later blog entry, but an extra topic I wanted to discuss this week is the Frenet frame. The Frenet frame, also known as TNB frame, is a method used in animation to determine the correct orientation of an object that is moving along a predetermined path, so that it will always be looking in the direction it is moving. This is done by looking ahead on the path by a small amount to find a point P2 that the object is moving towards, and subtracting the objects current position P1 from it. The result is then normalized, which produces a \overrightarrow{D} vector for the object. The \overrightarrow{R} vector is then created by calculating the cross product of \overrightarrow{D} and the global up vector, \hat{y}. Finally, \overrightarrow{U} is calculated by taking the cross product of \overrightarrow{D} and \overrightarrow{R}. We then have all of the information needed to orientate the object correctly while it follows its path.

Object rotating according to the path it is following using a TNB frame. T stands for Tangent, and corresponds to the Direction vector (D). N stands for Normal, which corresponds to the Up vector (U). B stands for Bi-normal, which corresponds to the Right vector (R).


Computer Animation Week 3: Interpolation

Interpolation is the process of constructing new data points in the range of known data points. In computer animation, it allows us to create constant locomotion of objects between discrete waypoints. There are several different types of interpolation, but in class we discussed two main ones: linear interpolation (LERP), and splines.

Graph showing linear interpolation (LERP) between each red point.

Linear interpolation is the process of connecting waypoints by straight paths. As is seen in the image above, each waypoint, represented by red dots, is connected by blue lines that represent the interpolation between each way-point. This is the simplest form of interpolation, and the easiest to implement in code. However, as can be seen, it produces a curve that is not very smooth. While this is not so much of a problem for certain applications, for computer animation purposes it is generally not visibly appealing to see objects moving along paths that were generated via linear interpolation.

To calculate a linear interpolation, we use the term u to represent the current progress between the last waypoint and the next. For example, u would be 0.25 a quarter of the way to the second point, 0.5 exactly halfway between two points, and 0.75 three quarters of the way. The equation we can then use to calculate linear interpolation between point A and point B is:

p = (u – 1) * A + u * B

Where p is the point we are trying to calculate. This works in any number of dimensions, as each axis would be calculated independently.

As we discussed earlier, linear interpolation works well as a simple solution to find a straight path between waypoints, but is not great for generating a smooth path. This leads us to splines, the next form of interpolation that we discussed in class. Splines allow us to interpolate between waypoints in a way that produces a smooth curve across the entire path. There are several types of splines, but the two types we focused on in class were Bezier curves and Catmull-Rom splines.

A Bezier curve. P0 and P3 are the endpoints of the curve, while P1 and P2 are the control points.

A Bezier spline is specified by two endpoints and two control points. The location of the control points determines the curvature of the line that extends between the endpoints. The imaginary line that extends from an endpoint to its corresponding control point is the tangent at that very end of the curve, thus determining its slope at that endpoint.

A Catmull-Rom spline.

A Catmull-Rom spline is similar to a Bezier spline, except that it does not have specific control points that are separate from the points on the curve. Rather, points act as control points for its neighbours, producing a smooth curve without needing to play around with control points.

Splines can be represented mathematically using the following formula:

Where u is the same as it was in linear interpolation, representing the progress from the current point to the next, p(u) is the value of position on the curve at u, and [pi-1 pi pi+1 pi+2] are the endpoints and control points on a Bezier spline, or the points surrounding the current point on a Catmull-Rom spline. M is a matrix of constants that is different for Bezier and Catmull-Rom splines. For Bezier splines, it is:

and for Catmull-Rom splines, it is:

Computer Animation Week 2: The Twelve Principles of Animation

This week, we learned about the 12 principles of animation. These principles help to make animations more lifelike and help us develop emotional attachment to the characters. They are:

1. Squash and stretch

This principle gives objects the illusion of weight, but also flexibility. The basic idea is to make objects in an animation “squash” upon an impact (shorten along one axis and lengthen along the perpendicular axis), and “stretch” upon accelleration (opposite from squash, lengthens along first axis and shortens along second). This change in shape gives the object the illusion of being flexible and lively, as opposed to being completely rigid.

In the above image, A does not employ squash and stretch, while B does. As you can see, the shape remains the same for each frame in A, while in B the shape stretches for frames 2, 3, 5, and 6, squashes in frame 4, and is normal in frame 1 and 7.

2. Anticipation

Anticipation occurs when a character “winds up” prior to doing an action. It prepares the viewer for the action that is about to occur, and gives the action a more realistic feeling. It generally involves a character or object moving slightly in one direction before doing the main action in the opposite direction.

An example of anticipation can be found in the above image, where Donald Duck is winding up as he is about to start running. Even though people do not wind up before they start running in real life, it helps to increase realism in the animation.

3. Staging

The purpose of staging is to draw the viewer’s attention to the most important element in a scene. This is accomplished by framing, lighting, and viewing angle, among other things. This principle is important because it allows the viewer to focus on what is important in the scene, while being able to ignore details that may not be very important. With good staging, the animators are able to present any idea in such a way that it is completely clear and not misunderstood by the audience.

4. Straight ahead action and pose to pose

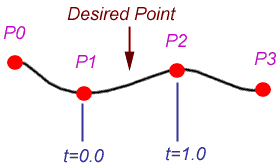
These are actually two different ways of drawing actions. Straight ahead is the process of drawing each frame one by one, from start to end. This results in more spontaneous and creative animation, as the poses are not planned out ahead of time. Pose to pose involves drawing out specific key frames that are most important for conveying the emotions or actions of the scene, and then filling in the rest of the frames later. As game developers, we will most likely be using the latter for our animation purposes because it is easier to have our artist make key frames of poses and let our animation engine interpolate between these key frames.

The above image shows an example of pose to pose action, where the black drawings are the key frames and the red drawings are frames that are filled in to complete the animation afterward.

5. Follow through and overlapping action

This principle demonstrates the fact that not all parts of a body will accelerate or decelerate at the same speed. For example, if a dog with floppy ears starts running, we expect its ears to start moving only after the rest of the body starts moving, showing that the ears are flexible and not rigid. Likewise, when the dog comes to a stop, the ears will follow through the stopping motion, and stop ahead of the dog and after it has stopped.

In the above image, one can see this principle in action when the character’s cape comes to rest long after the character has reached the ground.

6. Ease in and ease out

A character or other animate object is not capable of instantly accelerating or decelerating when it starts moving. Thus, in animation, putting extra frames at the beginning and end of movement gives the feeling of gradual acceleration and deceleration, which increases the realism of the movement. This is known as ease in and ease out, or slow in and slow out.

The above image demonstrates ease in and ease out. At the beginning and end of the movement, there are more frames than in the middle, indicating that the coin will move slower at the beginning and end than while it is in the middle of its movement.

7. Arcs

Living things generally move in arcs rather than straight lines. For example, when you throw a ball, your arm does not move straight out. Rather, your hand will move in an arc from behind you, up to above your head, and subsequently to your front. An example can be seen in the image below, where the club moves in an arc rather than a straight line.

8. Secondary action

In animation, secondary actions are those that add to and support the main action in a scene. For example, if the main action is a character walking, a secondary action could be the character swinging his arms while walking. An important aspect of secondary action is that it should not take away or distract from the main action, but rather accent it, making it more lively and life-like. In the image below, the primary action is the mouse running, and the secondary actions are the movement of its tail and its hat.

9. Timing

Timing refers to the number of frames that are used to produce an animation, which changes the speed of the animation. Timing is important because it is what forms the foundation for conveying emotion in a scene. For example, if a character is moving slow and sluggish, it can be deduced that the character is unhappy or tired. Timing can also be used for comical purposes, such as a pause before a very funny moment. It is also important for conveying that objects follow the laws of physics, increasing realism. For example, a large object should move slower than a very small object.

10. Exaggeration

Exaggeration is used to make realistic animation seem less static and boring. It can also be used to make it more obvious to the audience what emotions are being conveyed in the scene. For example, in the below image, Wile E. Coyote is extremely surprised by something. This emotion is made very obvious, and also comical, by the fact that his jaw has literally dropped to the ground.

11. Solid drawing

Solid drawing is the idea of conveying characters and objects in three dimensions, to give them a feeling of volume and weight. This is accomplished via correct anatomy, perspective, and shading. This is an important principle for hand-drawn animations, but thanks to the ability of computers to automate 3D image rendering from defined models, it is not as great of a concern to us as game developers.

12. Appeal

Appeal in an animated character is its ability to convince the viewer that it is real and interesting. Of particular importance here is the animator’s ability to convey emotion through the character’s facial expressions and body movement.

Computer Animation Week 1: History, Locomotion, and Animation

In the first week of our computer animation course, we were given a brief overview of the history of animation, and we also discussed simple locomotion and animation techniques. Animation is essentially a way to “bring to life” static images, to give the illusion of movement. This functions thanks to persistence of vision, which is a phenomenon where our eyes/brain retain images for a short period of time after they are gone. This causes quick, successive changes in static images to give the illusion of fluid motion instead of discrete images. Early techniques at animation included the thaumatrope, zoetrope, and praxinoscope, which were all devices that would rapidly swap physical images.

In a 2D game engine, sprites are used to represent characters. Sprites are essentially boxes that have a texture (the actual image of the character) mapped to them. The box itself has three properties: size, position, and rotation. These properties are what define the locomotion of the sprite. That is, locomotion is how the sprite (the box, and not the texture) move around on screen. The actual animation is defined by how the texture changes within the box, either by swapping the visible image (e.g. via a spritesheet) or by modifying the colour of the texture.